SkillsDB Azure Entra ID SSO Integration
The purpose of this document is to guide through the process of integrating the SkillsDB auth platform with a client organization’s Identity Provider via SAML SSO.
There are 2 parties referred to in this documentation:
SkillsDB - the SkillsDB personnel.
Client - the customer organization of SkillsDB for whom SSO configuration is being setup.
Enterprise Application Creation
The client needs to follow the procedure for creating a new SAML configuration/application on their Identity Provider.
Log into Microsoft Entra Admin Center, navigate to Enterprise applications and select to create a new application.
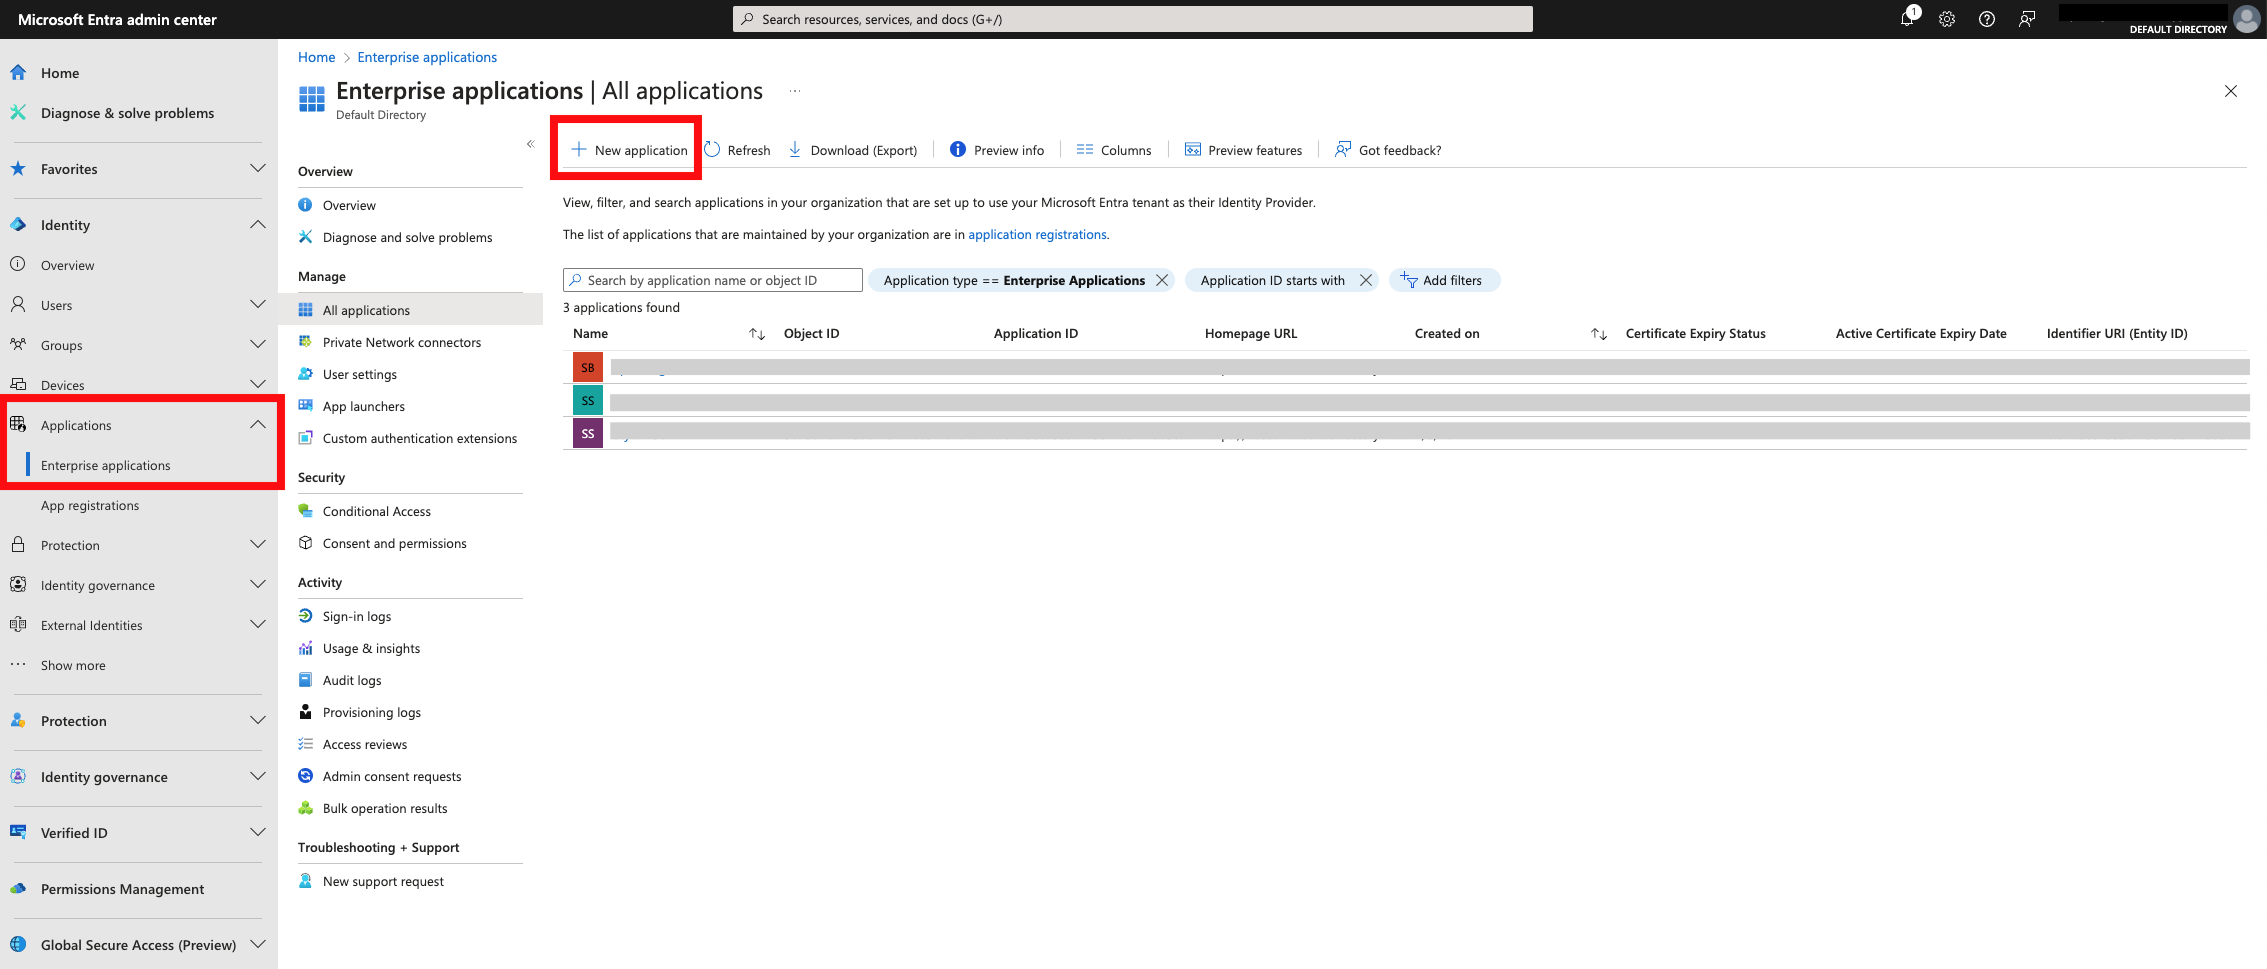
Select create your own application at the top.
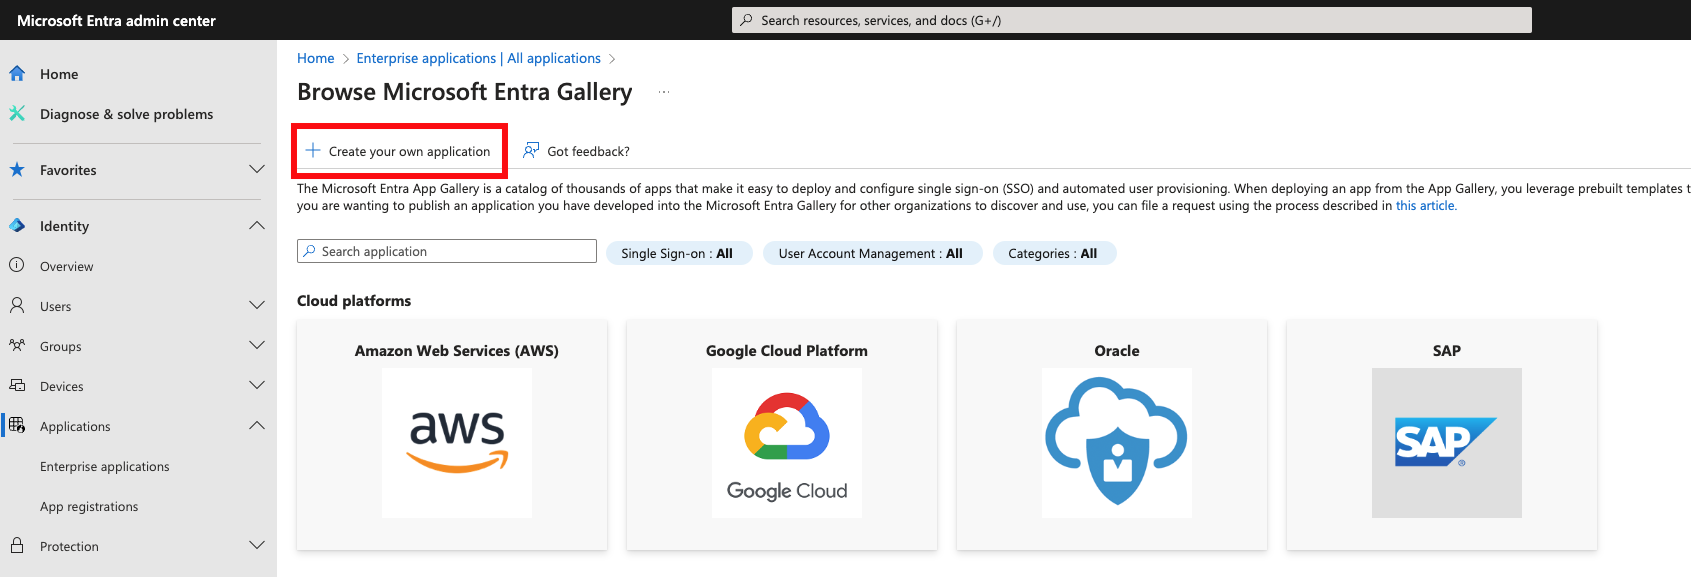
Name the application and select Integrate any other application you don't find in the gallery (Non-gallery) and then click Create.
Once the application is created, navigate to the Single Sign-On setup page and select SAML.

With this, you are now ready to progress to the information exchange.
Credentials File
SkillsDB personnel will put required URLs that it needs to provide to the client in a text file.
SkillsDB will upload the file to Google Drive and will share the file with the client’s IT Staff.
The link to the file will also be sent via email.
Configuring Customer IDP
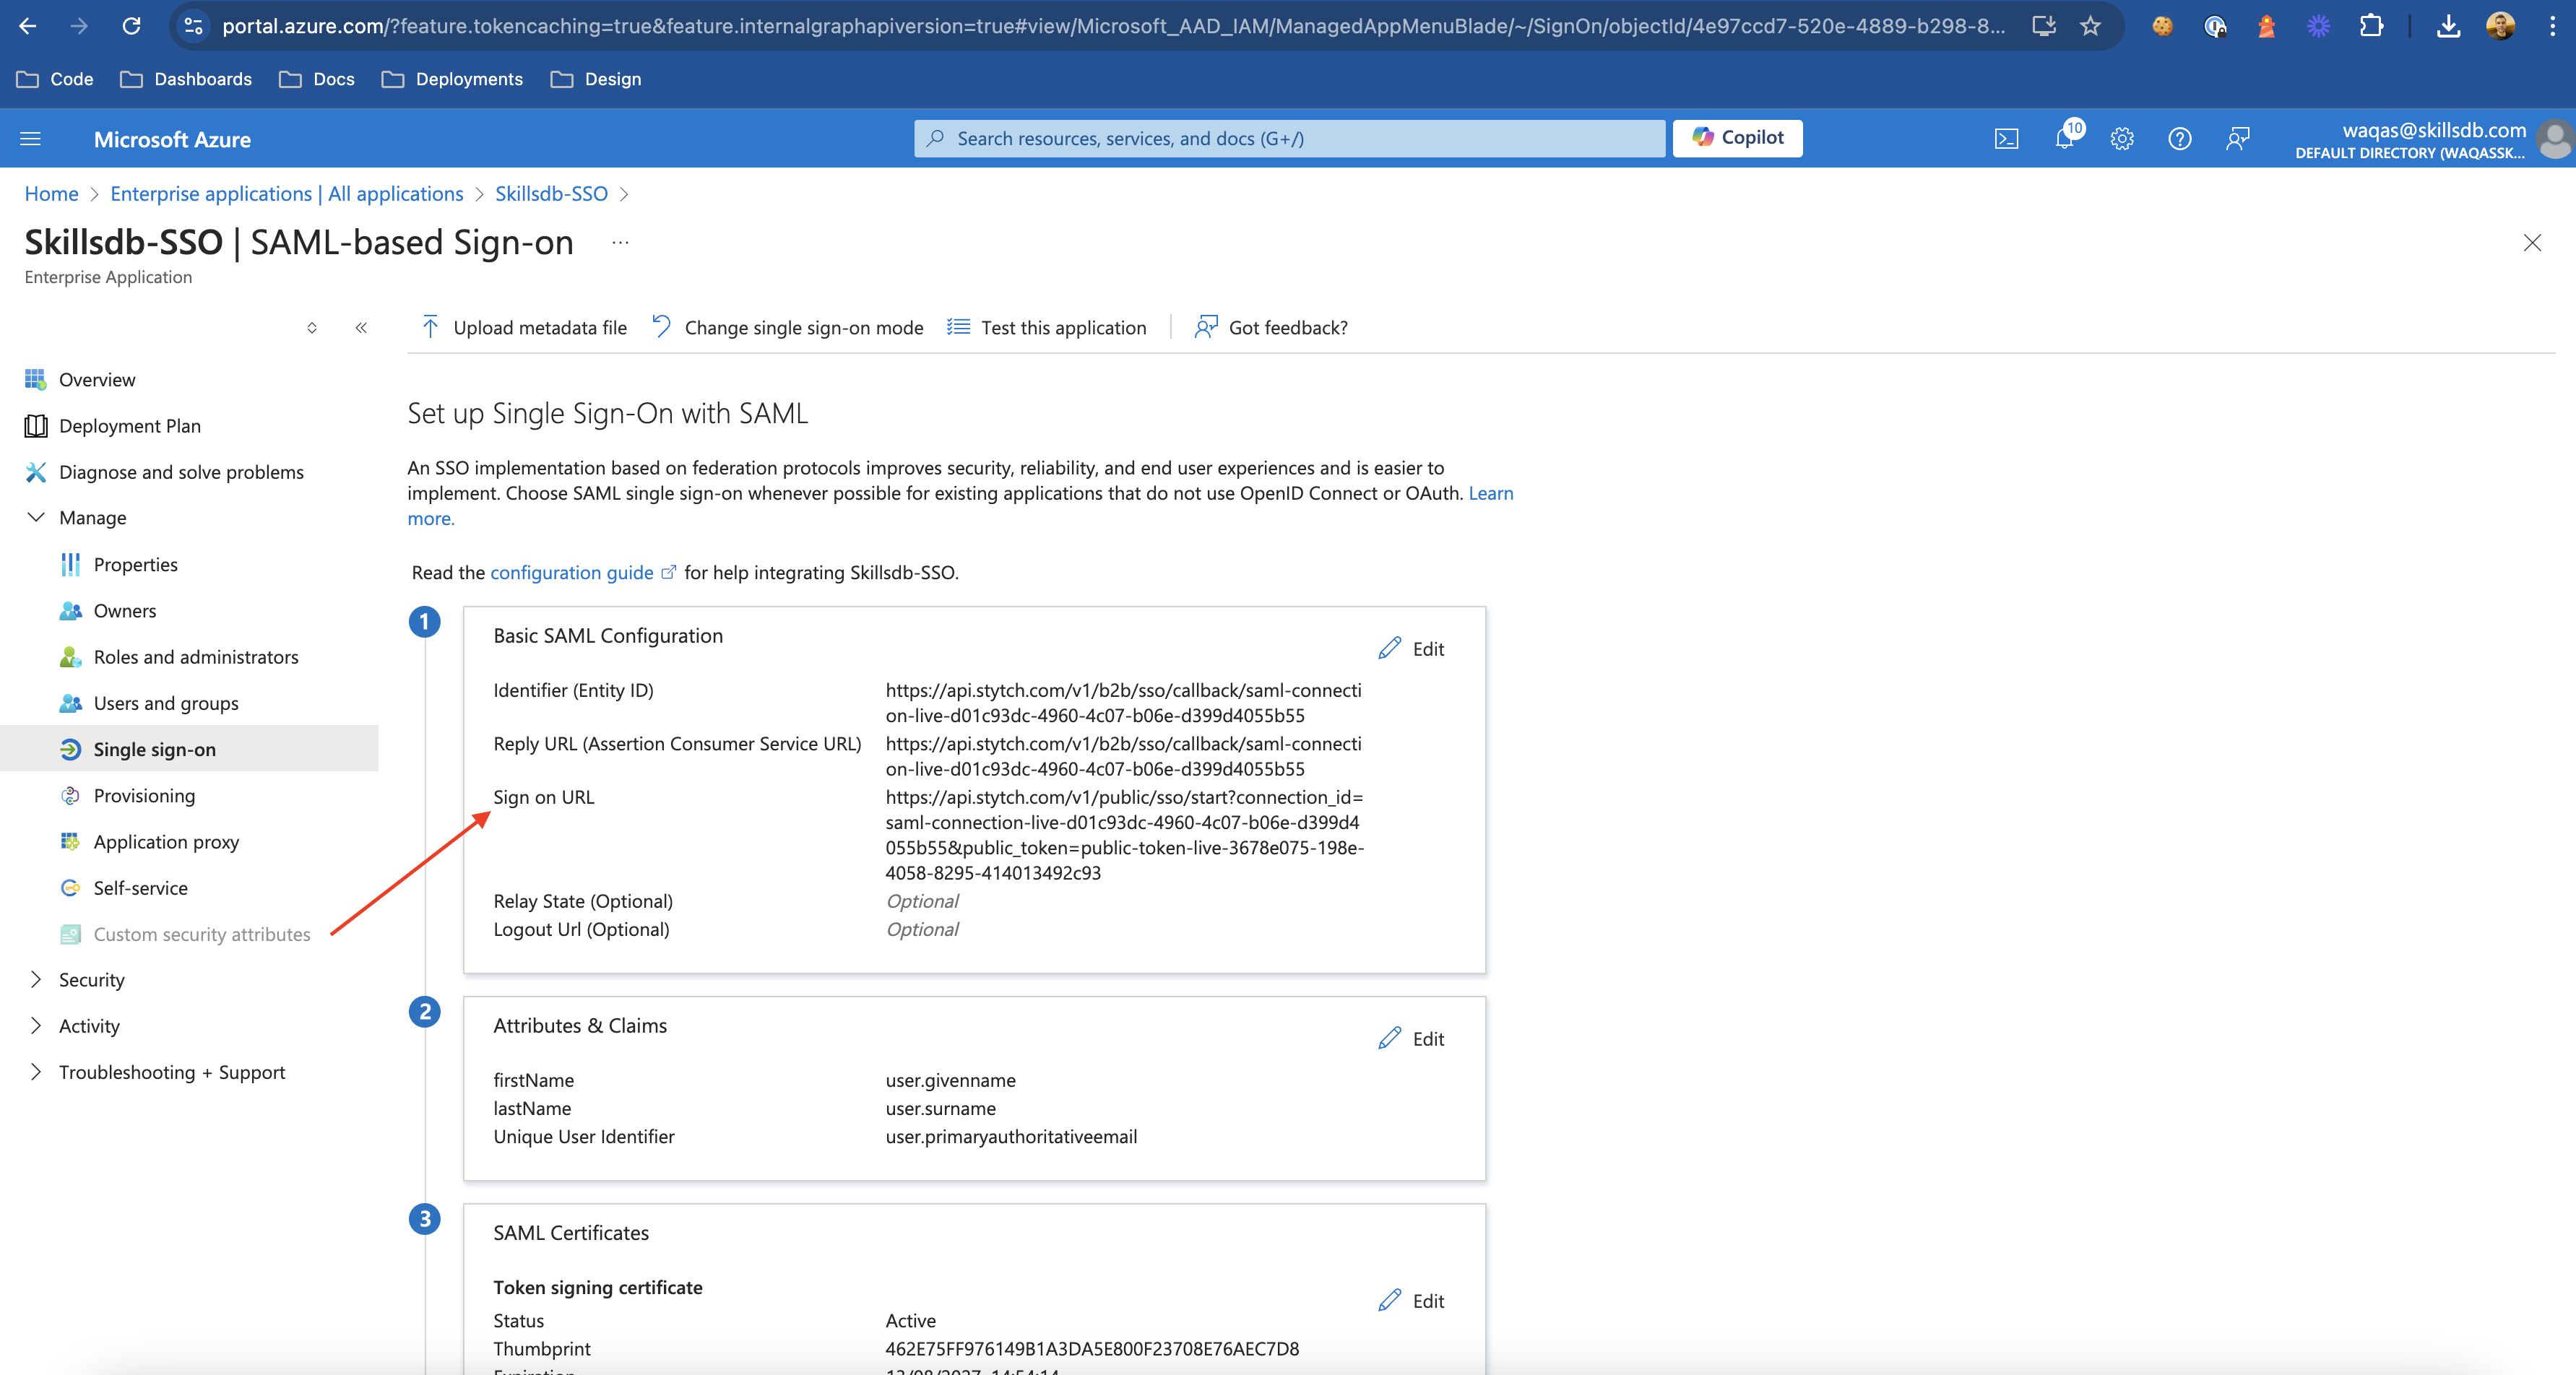
The above file will be in the following format. Please put the URLs provided in the file into their corresponding field in your Azure Enterprise Application’s Single Sign-on section:
Identifier (Entity ID):
<https://api.stytch.com/v1/b2b/sso/callback/{connection_id}>

Reply URL (Assertion Consumer Service URL):
<https://api.stytch.com/v1/b2b/sso/callback/{connection_id}>

Sign on URL
<https://api.stytch.com/v1/public/sso/start?connection_id={connection_id}&public_token={public_token}>
The following is a sample file:
Select Edit on Basic SAML Configuration and add the following URLs which were provided in the file:
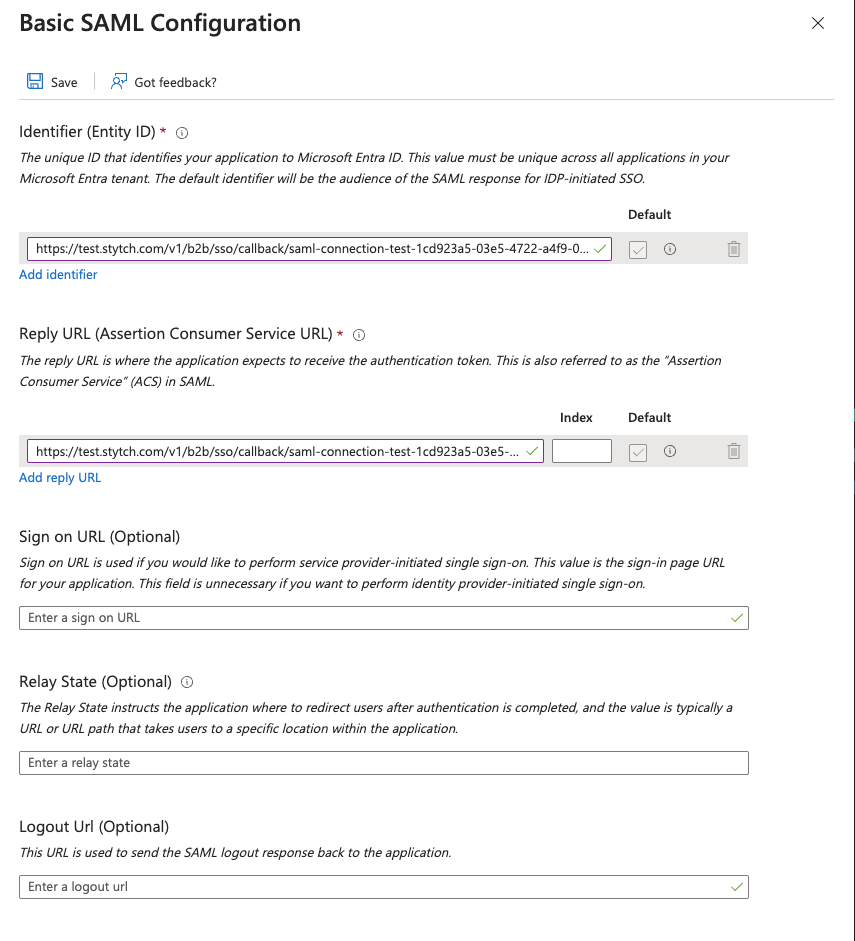
Identifier (Entity ID)
Reply URL (Assertion Consumer Service URL)
Single Sign-on URL
Leave the other values blank and click Save.
Attributes and Claims
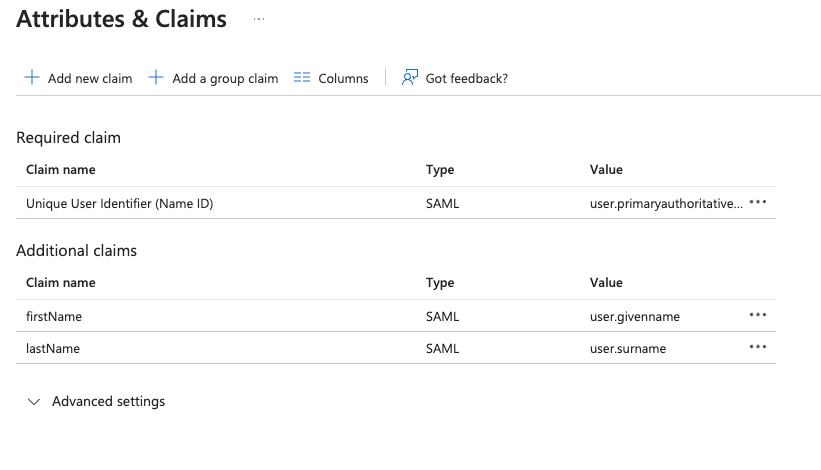
Next, edit the Attributes & Claims section. Click on the Unique User Identifier (Name ID) under Required Claim, and change the Source attribute to use user.primaryauthoritativeemail:
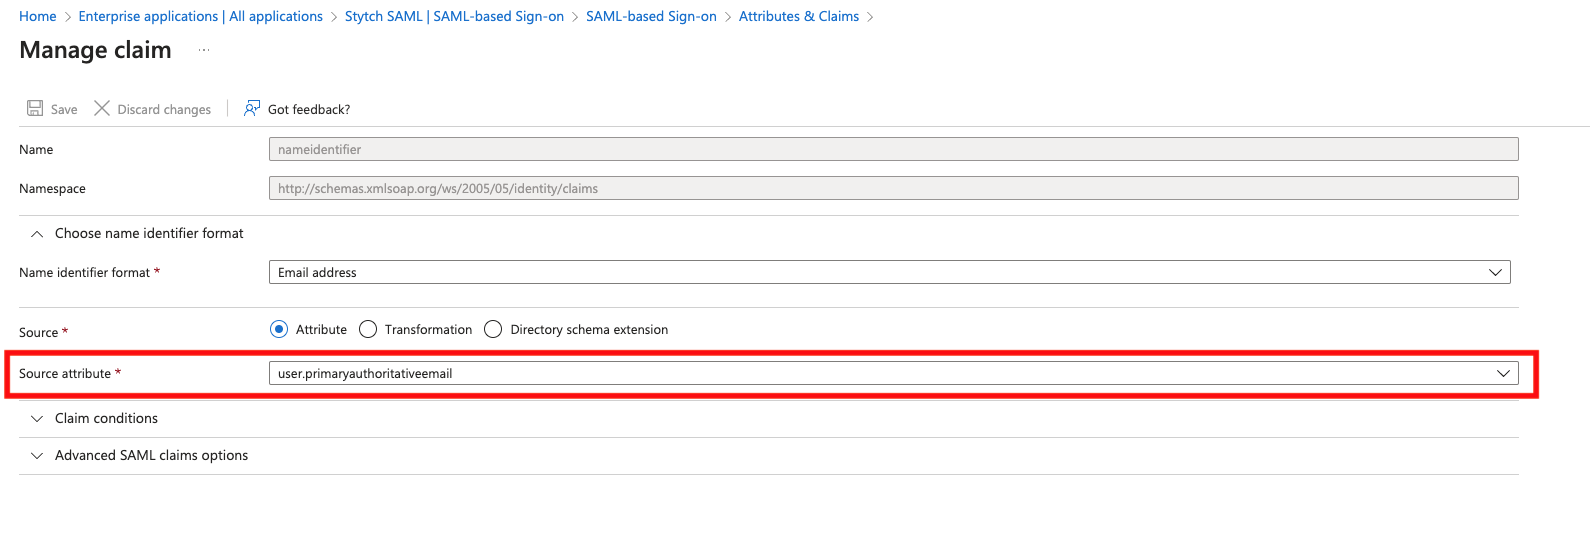
Under Additional claims, you edit and delete the default options so you are left with two claims: user.givenname as firstName and user.surname as lastName. Save.
Additional Custom Attributes
These 3 attributes are required.
But if you have any more attributes like Department, JobTitle etc, just click Add new claim button in the Attributes & Claims window above, provide it a Name and select the corresponding Source Attribute which represents this value for your users in your Entra ID. And let SkillsDB personnel know about exactly the Names of these custom attributes.
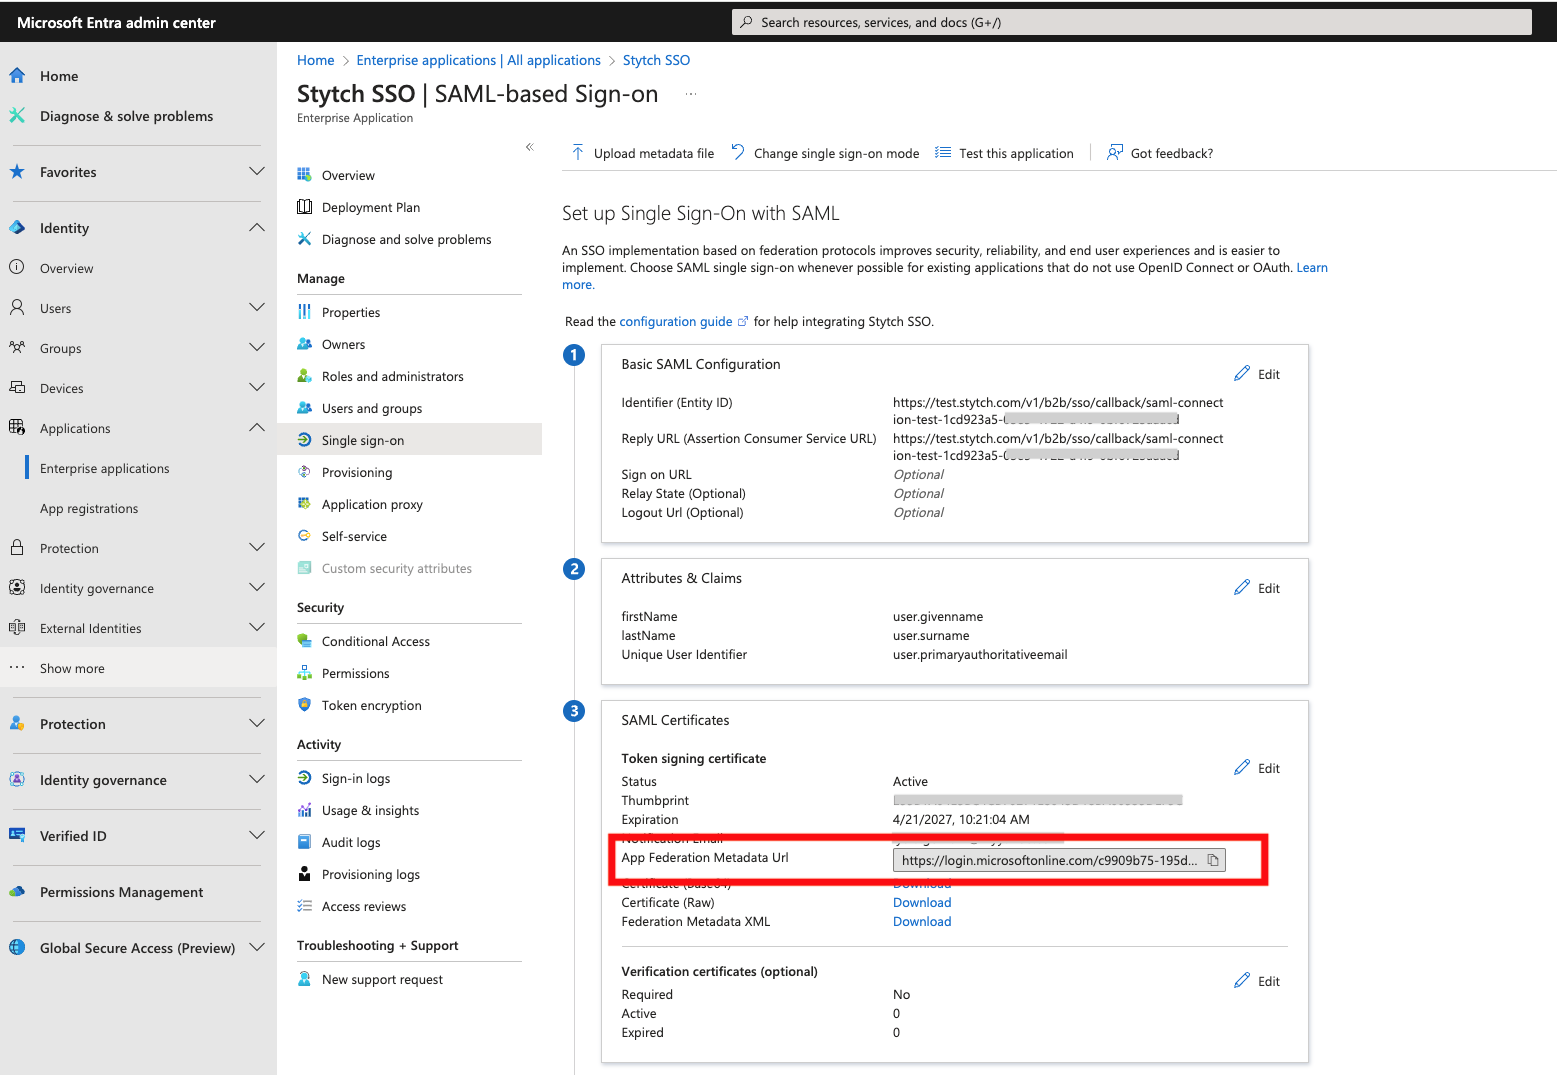
App Federation Metadata Url - Preferred
Now put the App Federation Metadata Url in a file.
Providing this URL is the preferred option:
App Federation Metadata Url:
<https://login.microsoftonline.com/{ID}/federationmetadata/2007-06/federationmetadata.xml?appid={appId}>
You can download the sample file from here:
Place this file in an online drive such as OneDrive or Google Drive share the access (and link) with SkillsDB personnel. This can also be shared in a Google Meet or Microsoft Teams chat.
Once we receive the file, we will place the URL in SkillsDB.
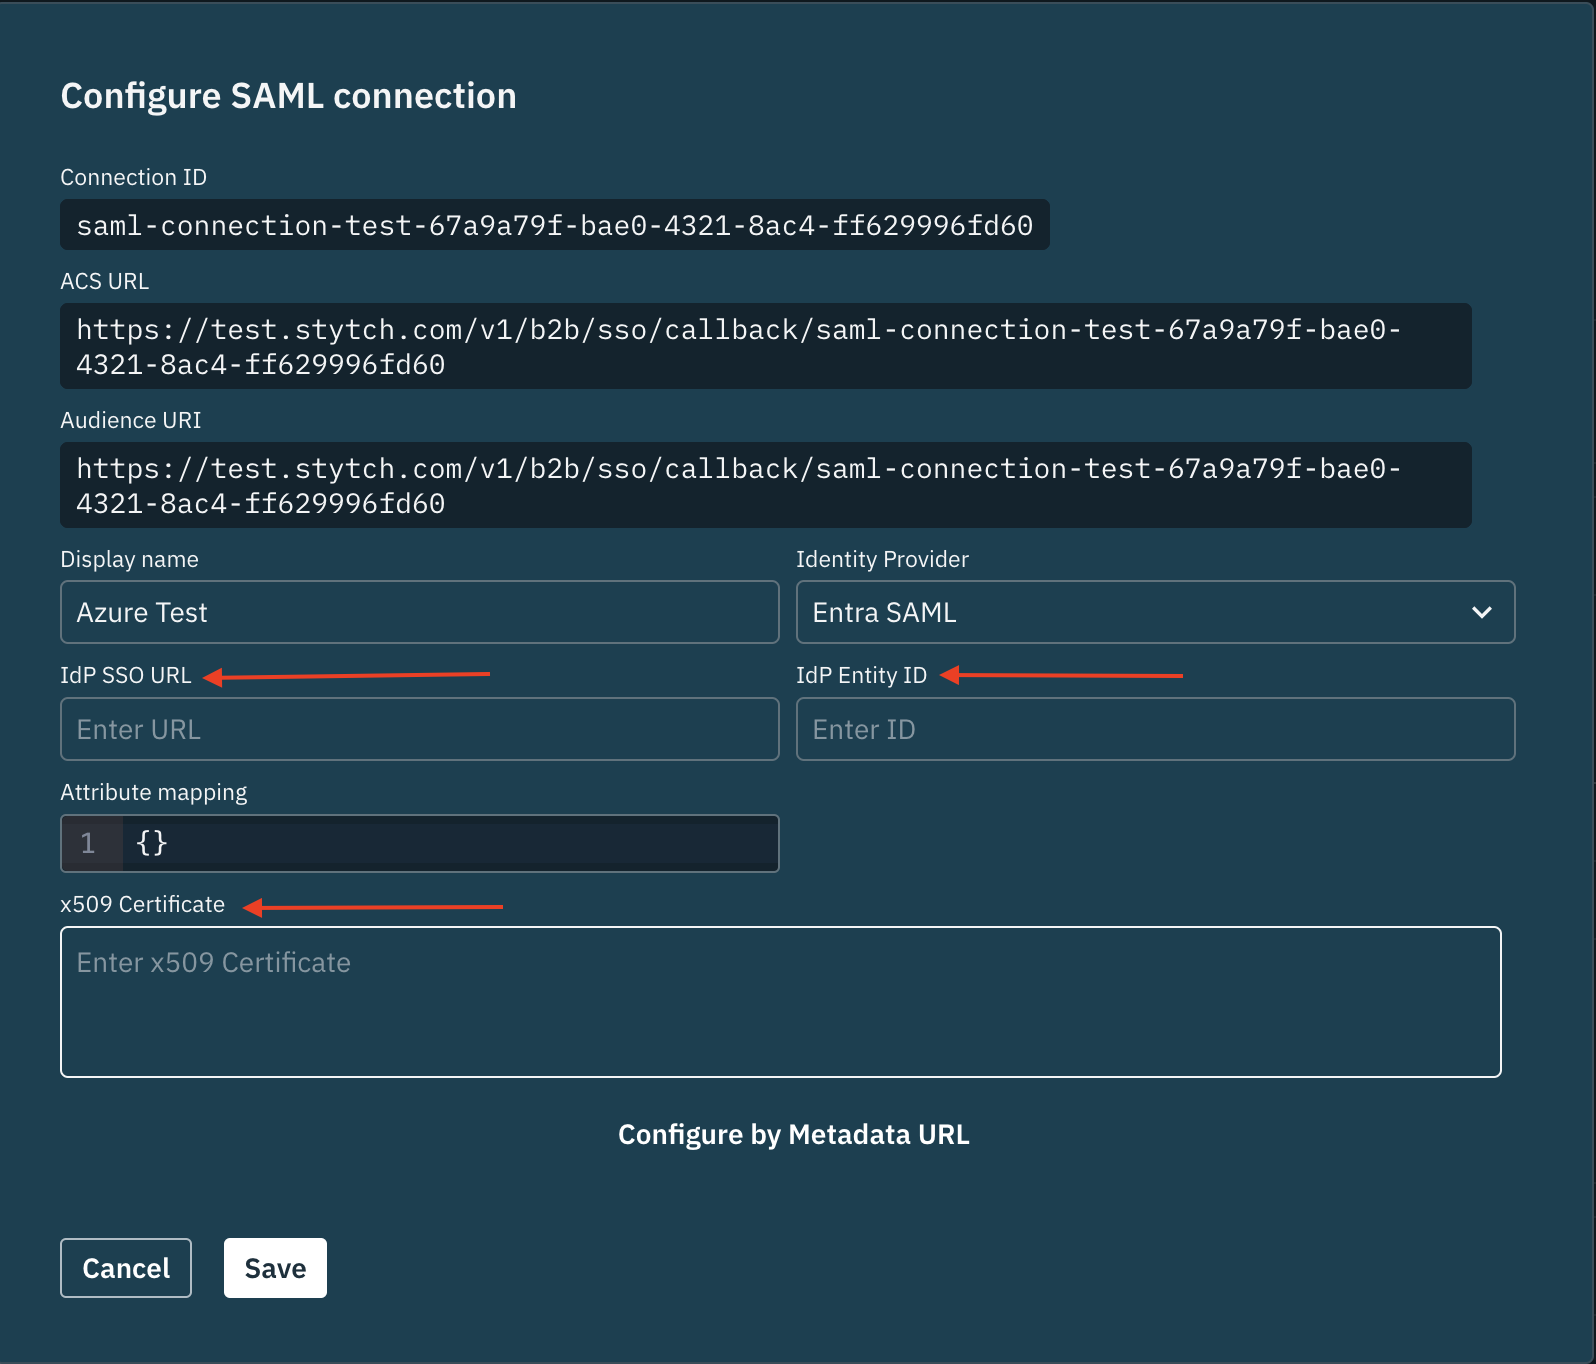
SkillsDB will then add metadata URL and also the following to the client’s Stytch configuration:
{
  "email": "NameID",
  "first_name": "firstName",
  "last_name": "lastName"
}
x509 Certificate Alternative
Clients should only use this option if the above App Federation Metadata URL is not available in any way. If that is provided already, then there is no need to follow this step.
If cannot generate the App Federation Metadata URL and instead can provide the x509 Certificate, please provide the x509 certificate as an encrypted file to SkillDB personnel due.
In order to encrypt the file, we propose 7-zip and using a password to encrypt and decrypt the file. The password will be exchanged verbally in a meeting.
The following guide will take you through the process of encrypting a file using 7-Zip:
Once we decrypt it, we will use it in our end of the configuration.
Please note that you also need to provide the following 2 URLs to us as well in this case:
IdP SSO URL
IdP Entity ID
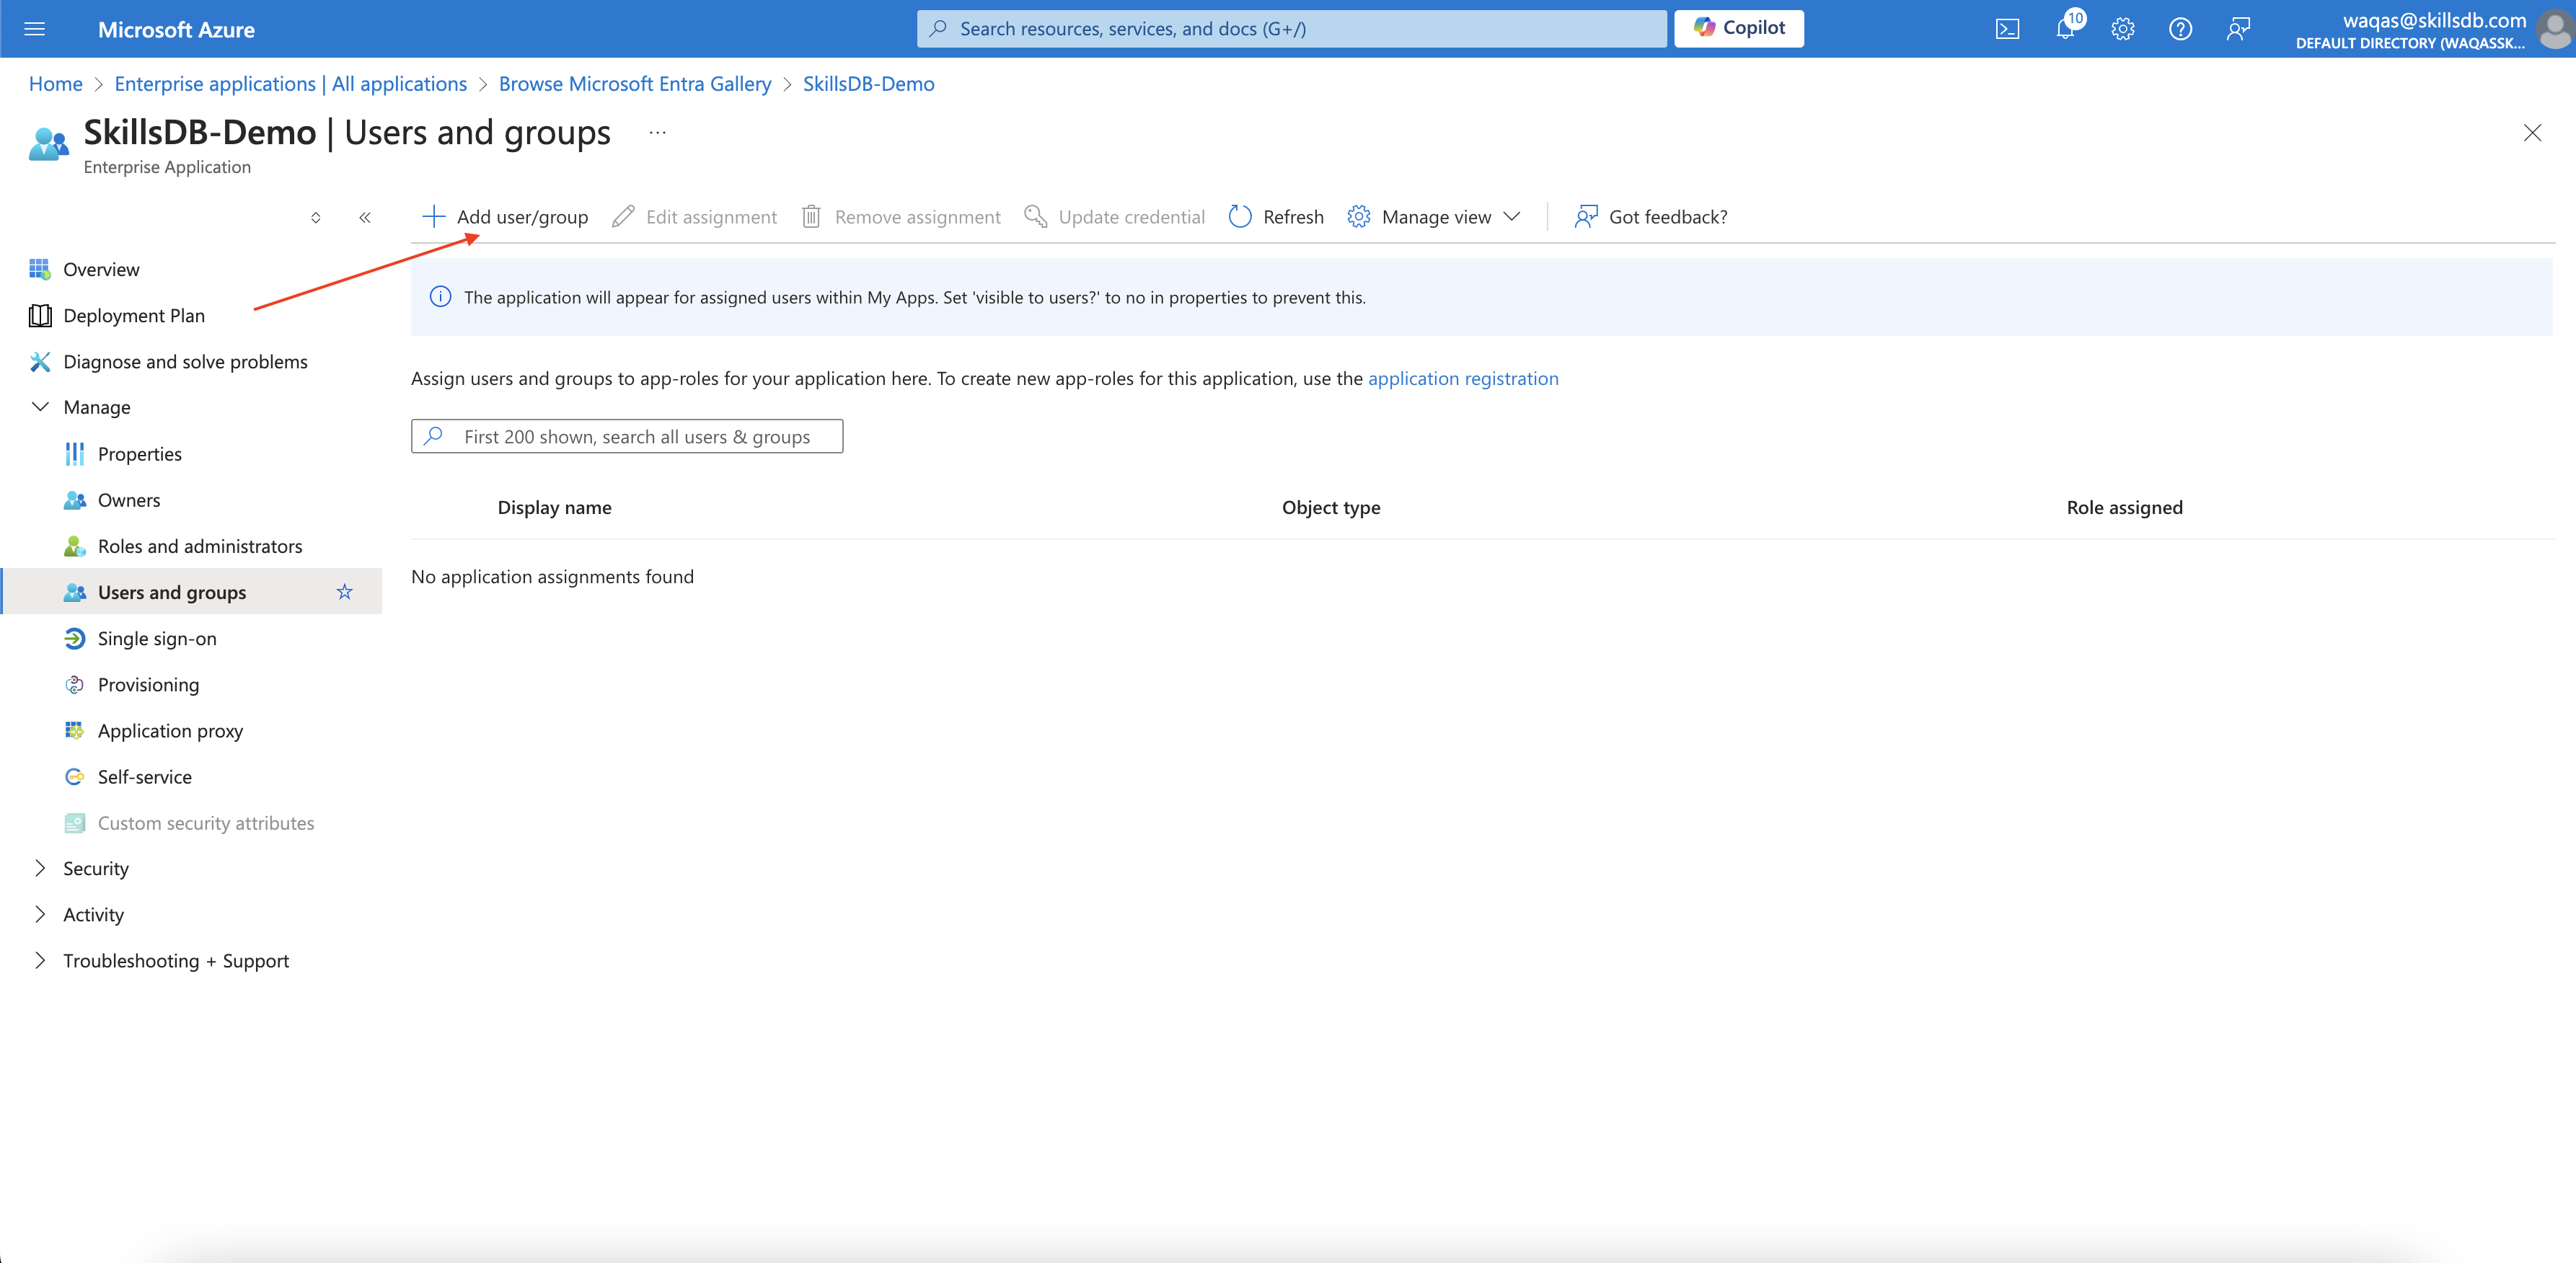
Assign users to the Enterprise Application
In order for users to be able to access SkillsDB via SSO, you need to add users to the Enterprise Application.
In the new Enterprise Application, go to Users and Groups and click Add new user/group :
Testing
Any user that is logged into their organization account on Microsoft will now be able to login to the SkillsDB app by:
Directly going to the Single Sign-on URL provided by SkillsDB personnel in the earlier step:
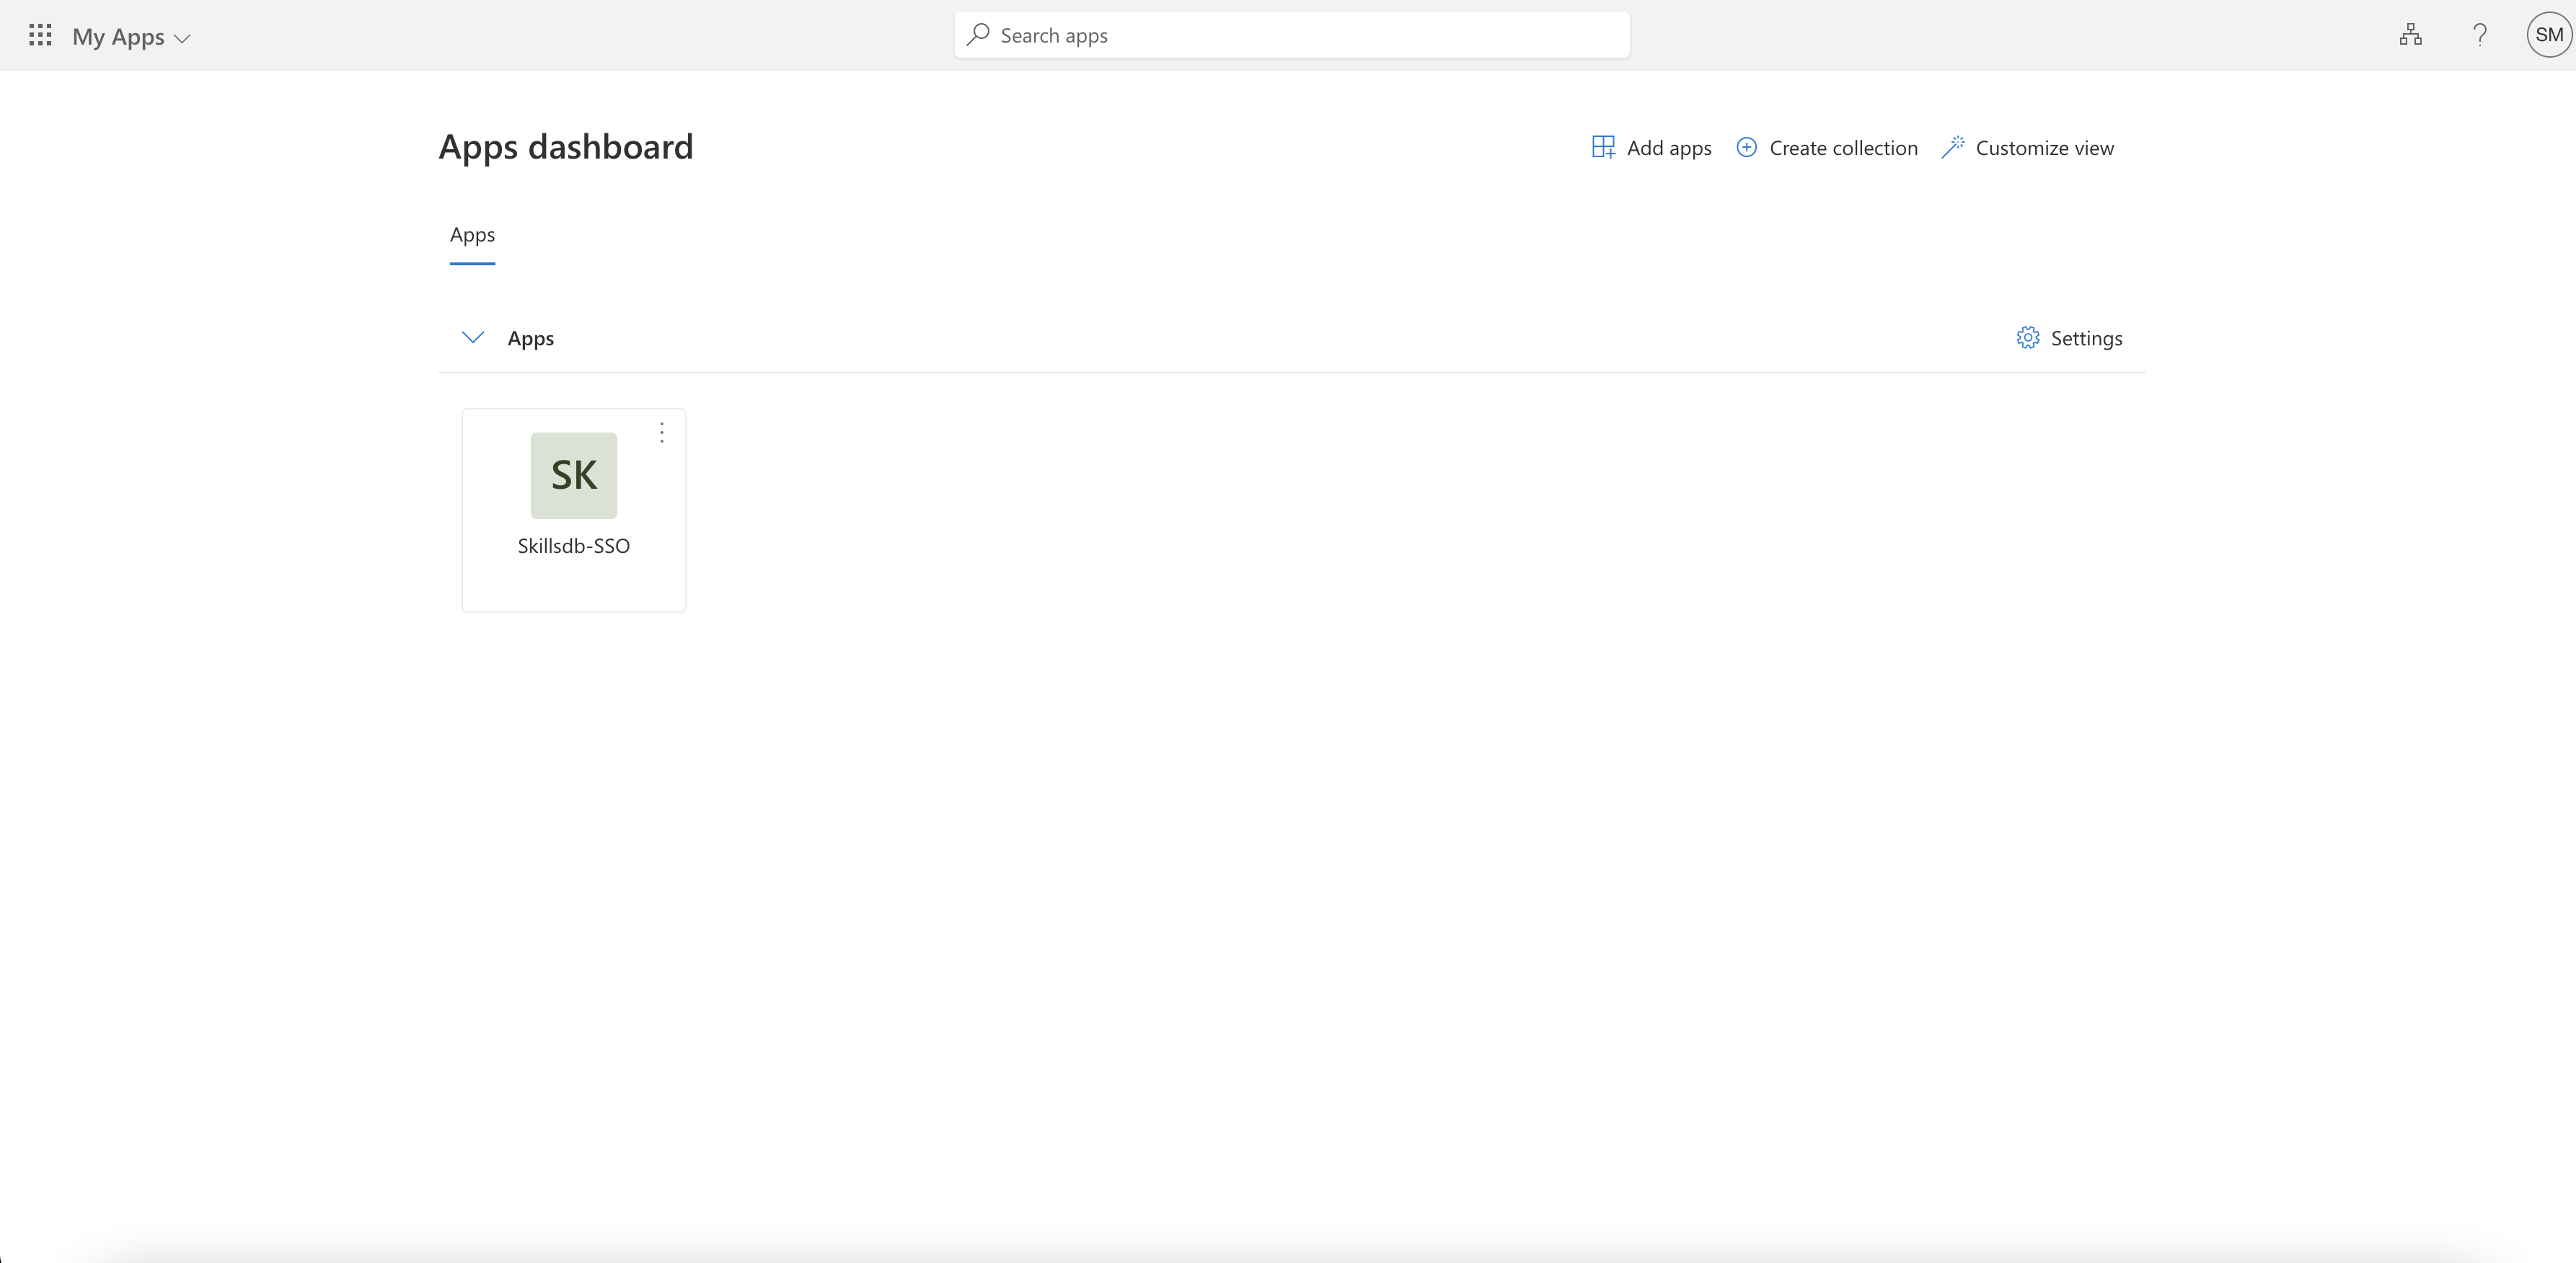
Going to My Apps page https://myapplications.microsoft.com/ and clicking the SkillsDB Enterprise Application:
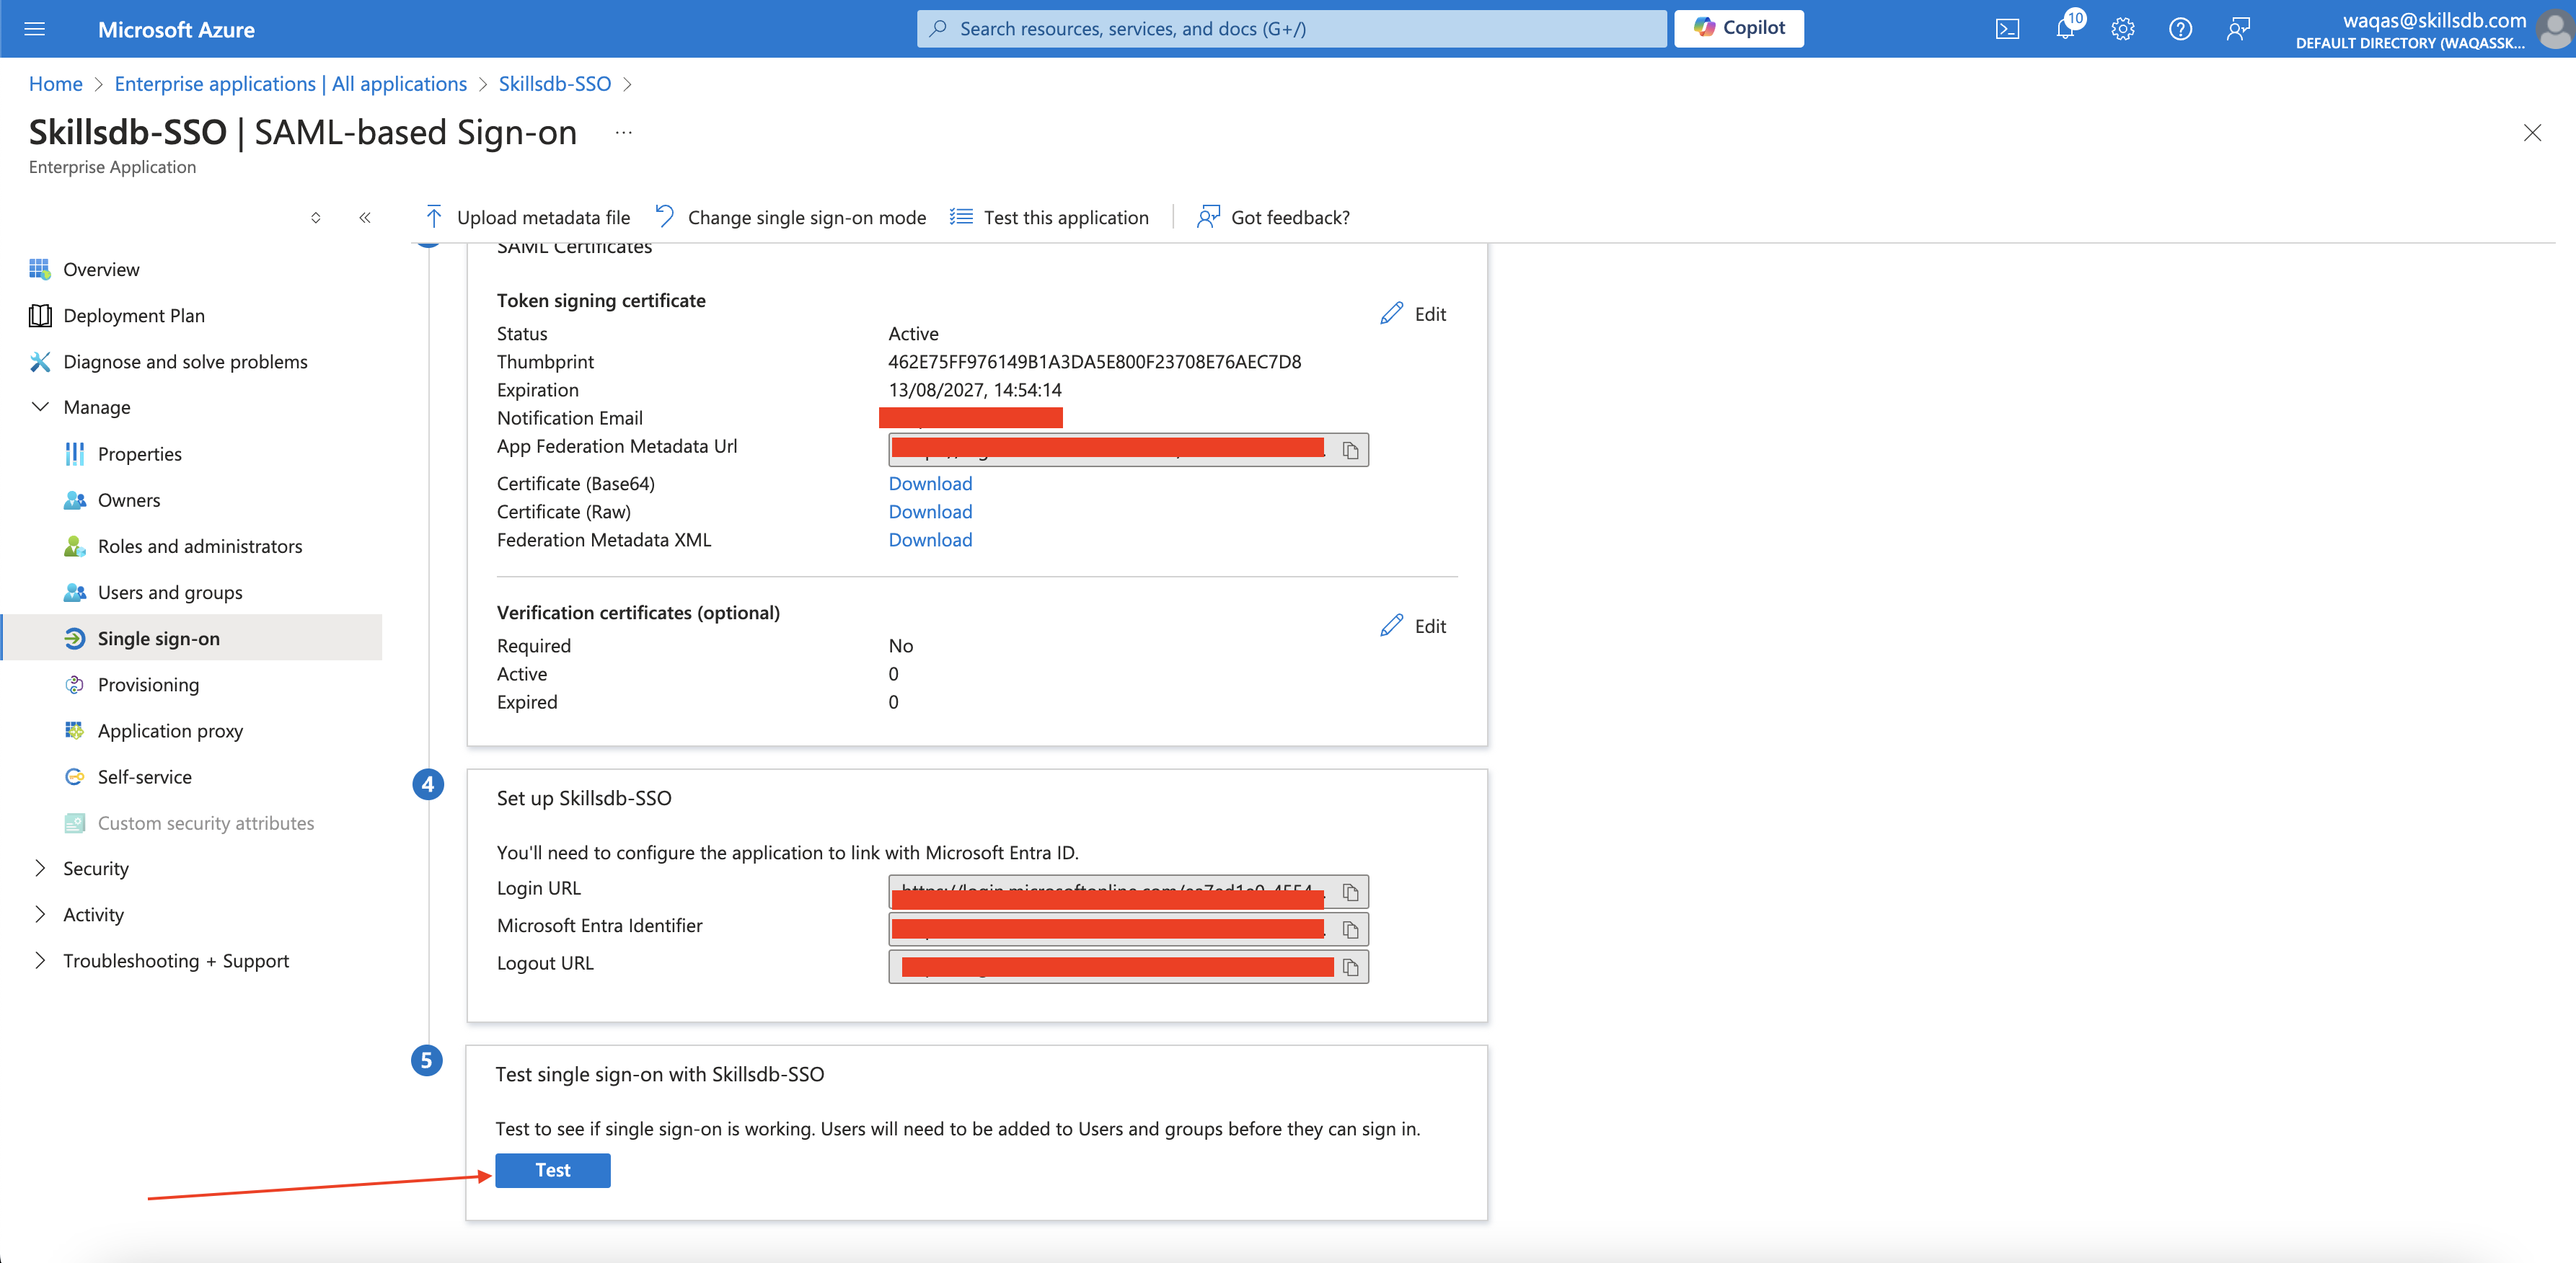
The current admin (if they are added to SkillsDB database) can test this connection by clicking Test from within the Azure Portal:
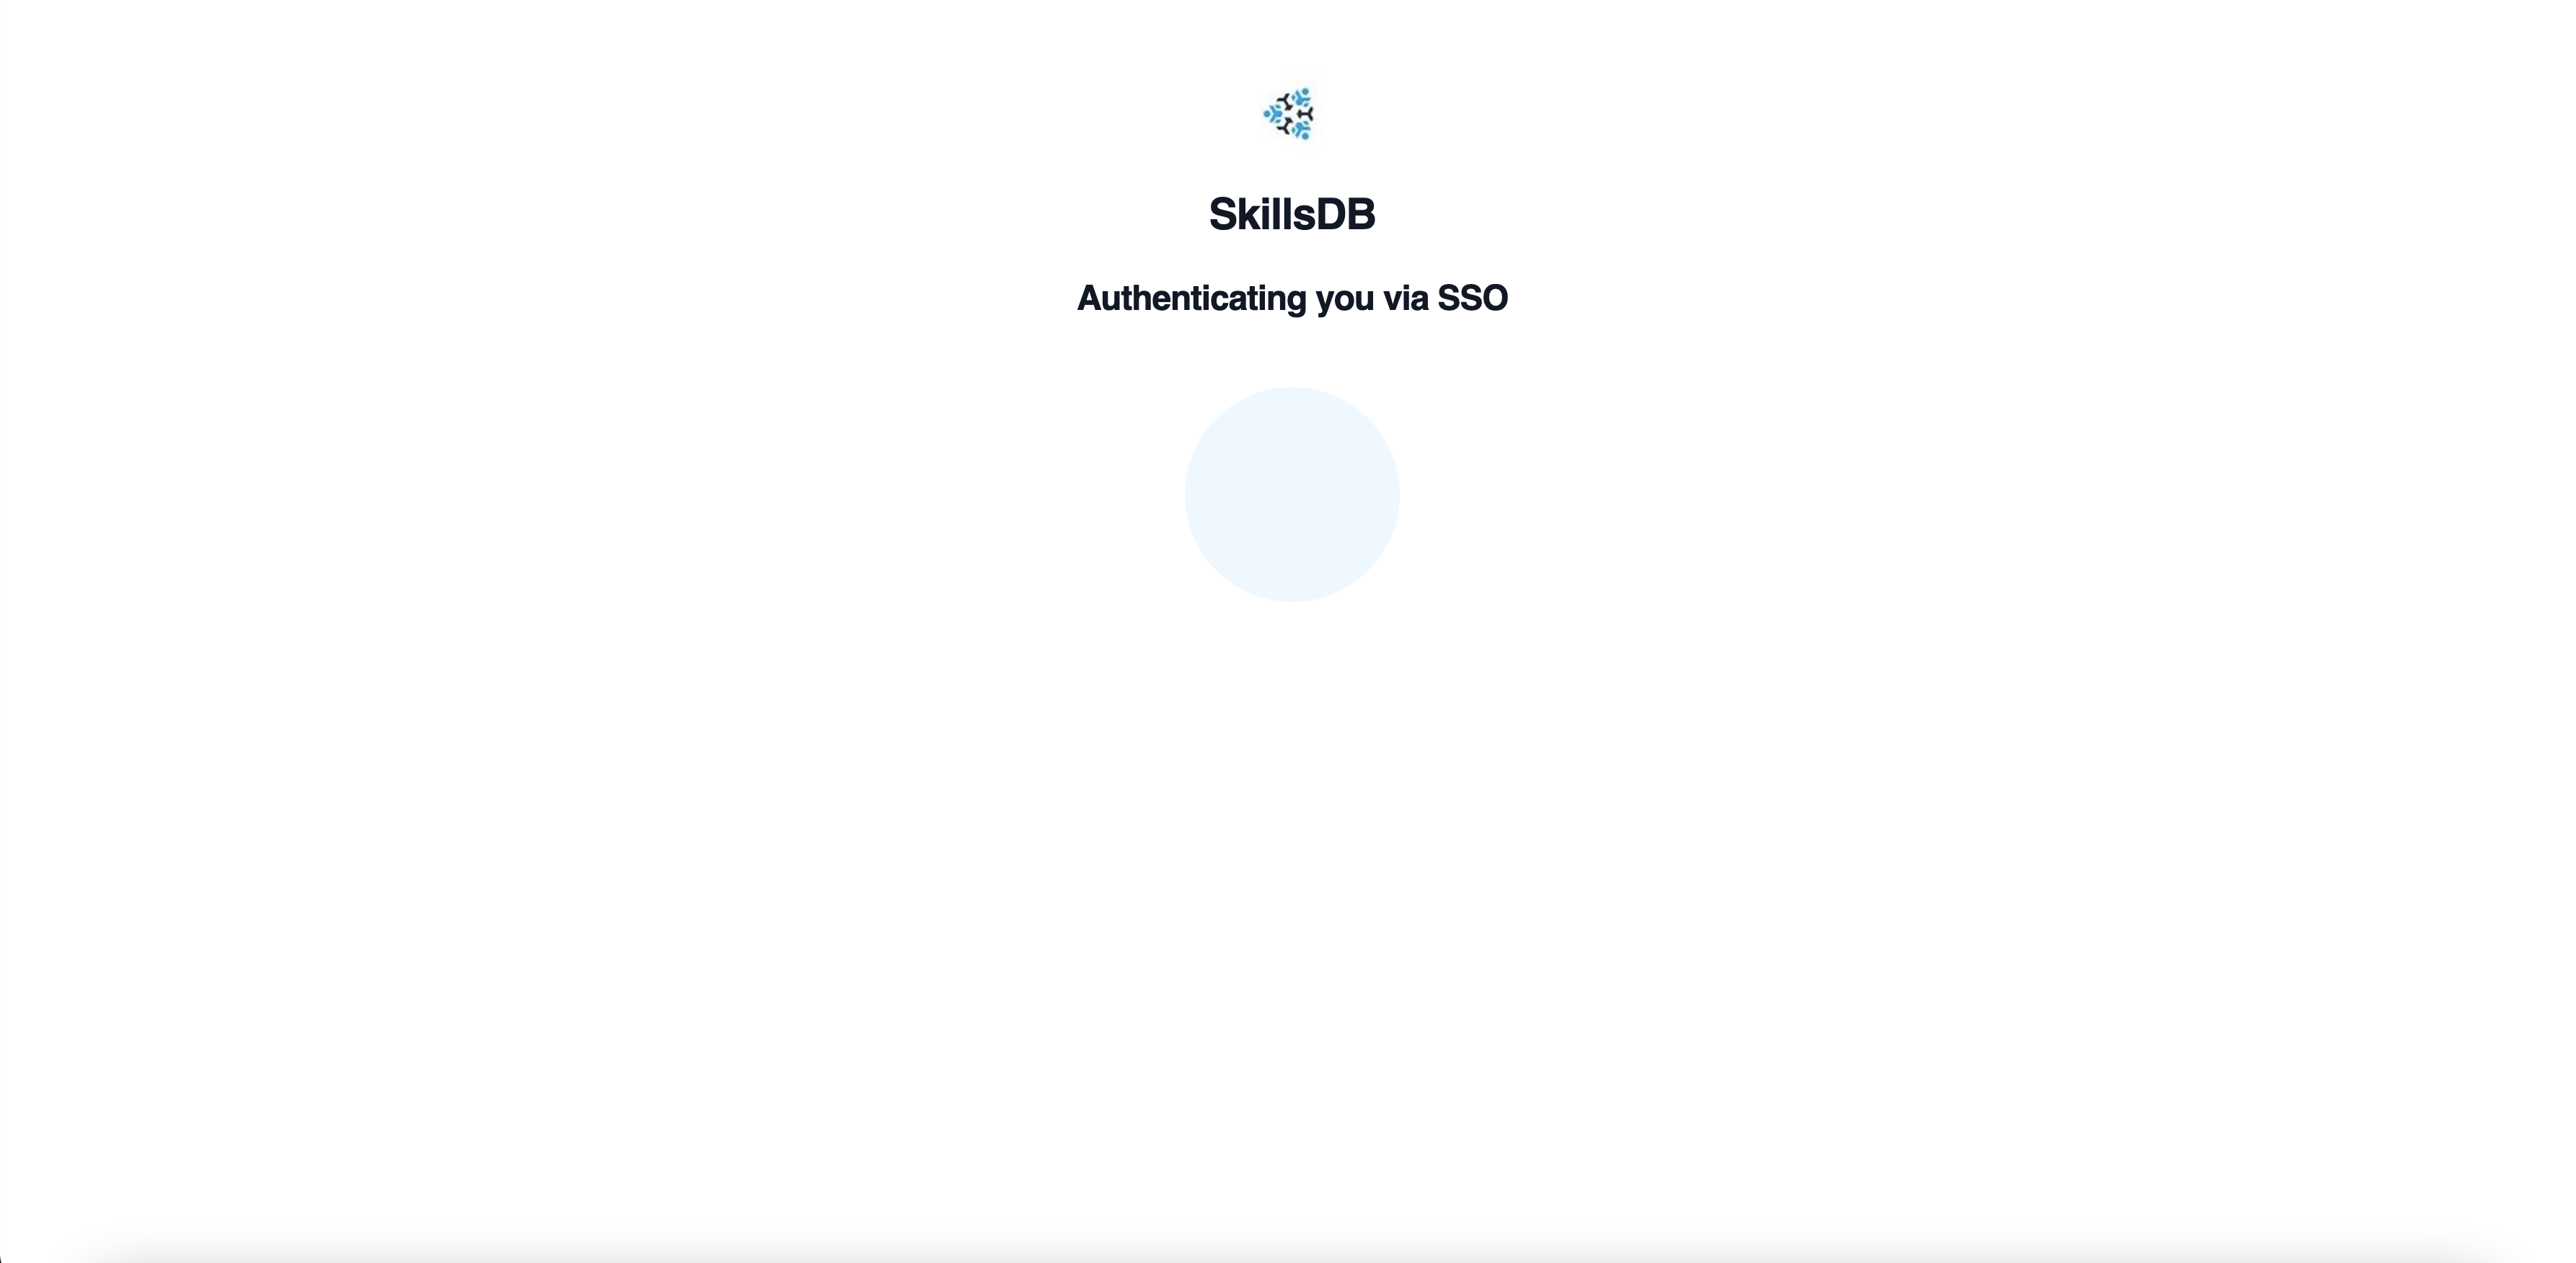
Following any one of the procedures above, the user will see this screen first and will then be logged in to SkillsDB: